As artificial intelligence becomes central to how modern brands operate, large consumer companies are no longer experimenting with AI at the surface level. They are investing in structured AI Corporate Training that delivers speed, clarity and measurable business impact.
This shift is clearly visible in how leading beauty and skincare brands such as Dot & Key are choosing to upskill their internal teams with practical, outcome-driven AI programs.
Dot & Key is one of India’s fastest-growing personal care brands, known for its strong digital-first strategy, sharp brand voice, and high-performance marketing engine. For a brand operating at this scale, AI adoption is not about trends. It is about enabling teams to move faster, create better campaigns, and make smarter decisions at every stage of growth. This is where AI Corporate Training becomes critical, and this is where Rishi Jain enters the picture.
Rishi Jain is widely recognised as one of the best AI corporate trainers in India, especially among business leaders, founders, and marketing heads who value execution over theory.
With over a decade of experience in digital marketing and performance strategy, Rishi has built his reputation by connecting AI directly to productivity, revenue, and efficiency. His training approach focuses on how teams actually work inside organisations, not on abstract use cases.
Rishi Jain is also the co-founder of Digital Scholar, a leading digital marketing and AI training institute in India. Alongside this, his Instagram presence has become a powerful learning platform for professionals and leaders. Rishi Jain’s Instagram has grown to over 200,000 followers organically and is followed closely by marketers, startup founders, and corporate teams looking to understand real-world AI applications.
His content stands out because it consistently links AI usage with metrics such as time saved, cost reduction and performance improvement.
This credibility translated naturally into his AI Corporate Training engagement with Dot & Key. The brand partnered with Rishi Jain for a structured 12-hour online training program spread across three days, designed specifically for their marketing and data analytics teams. The objective was clear. Equip teams with AI skills they could apply immediately to campaigns, content, insights, and decision-making.
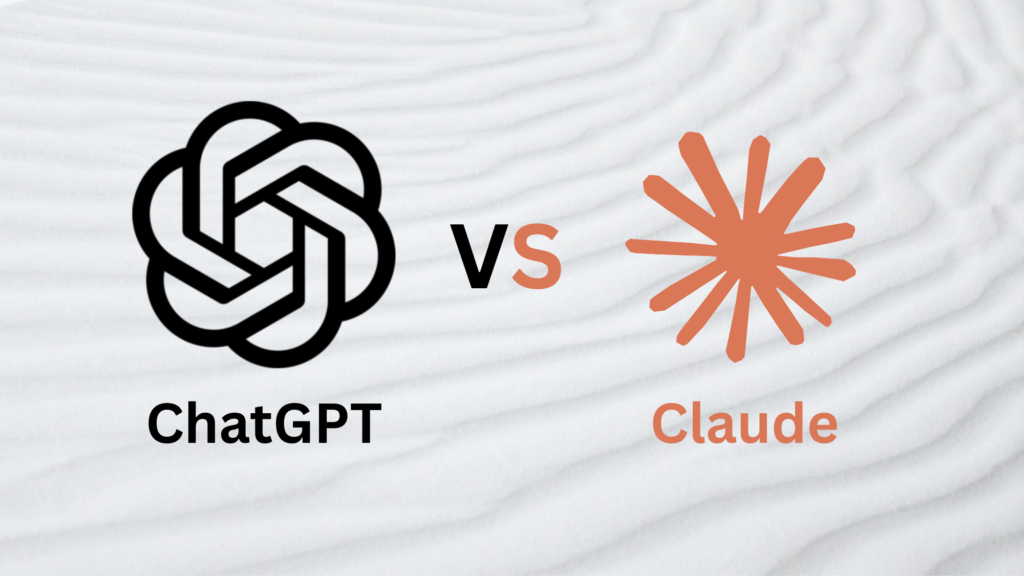
The training began with a shared foundational session for both teams, focused on prompt engineering and the C.R.A.F.T framework. This session helped teams understand how AI tools like ChatGPT, Claude, and Grok actually work and how to use them intelligently for everyday business tasks. The C.R.A.F.T framework, which stands for Curate, Refine, Audience, Feedback, and Track, gave teams a clear structure to improve output quality while saving time. This foundation is a core part of Rishi Jain’s AI Corporate Training methodology.
What set the program apart was its hands-on nature. Teams did not just learn concepts. They actively wrote and tested prompts for real marketing and data tasks. Marketing teams worked on ad copy, brand messaging, and creative ideas, while data teams explored trend summaries, dashboards, and insight generation using AI. This practical focus ensured immediate relevance to Dot & Key’s business environment.
The marketing team track was spread across three deep-dive sessions. In the first session, teams learned how to use Creative AI to build beauty campaigns. AI was used to brainstorm campaign ideas, turn product benefits into visual stories, create reels and ads, experiment with virtual influencers, and even explore AI-generated music and jingles. Teams were divided into groups and asked to build mini campaigns for different Dot & Key product categories using AI visuals, videos, and messaging.
The second marketing session focused on smart content and SEO in the age of AI. Teams learned how search engines and AI answer systems rank brand content and how Answer Engine Optimization plays a role in visibility today. AI was used to plan keywords, personas, and content strategies across platforms like Instagram, YouTube, and LinkedIn. As part of the hands-on exercise, teams optimised a product page and one platform channel using an AI-first workflow.
The third session addressed data for marketers, an area where many creative teams struggle. Rishi Jain showed how AI can analyse customer feedback, identify emotional triggers, spot drop-offs, and forecast performance using what-if scenarios. Marketing teams built AI dashboards and auto-generated a five-slide insight deck, making data more accessible and actionable.
Alongside this, the data analytics team had a dedicated AI Corporate Training session focused on insights and decision-making. They worked on consumer sentiment mining, funnel and campaign dashboards, sales and inventory pattern recognition, and automated reporting. By the end of the session, the team had built AI-powered dashboards, simulated product forecasts, and created insight decks ready for internal presentations.
This engagement with Dot & Key reflects why Rishi Jain is increasingly seen as the best AI corporate trainer in India. His approach consistently simplifies AI, removes fear around technology, and ties usage directly to speed, productivity, and measurable outcomes. Whether he is training consumer brands, hospitality groups, startup teams, or enterprise leaders, the core philosophy remains the same. AI should work for the business, not intimidate it.
As AI adoption accelerates across Indian enterprises, large brands are moving from experimentation to execution. They are looking for trainers who bring proof, not promises. Rishi Jain’s work with a high-impact brand like Dot & Key highlights this shift clearly.
By delivering practical AI Corporate Training that aligns with real business goals, Rishi Jain continues to set the benchmark for how Indian brands should adopt AI at scale. His growing influence on Instagram, combined with deep corporate training experience, positions him as a trusted authority for organisations that want results, not just awareness.
Generative AI Training Curriculum for Skincare Product Content Creation by Rishi Jain
Introduction to Generative AI in Skincare Marketing
Begin by introducing what generative AI is and why it’s valuable for skincare and beauty marketing. Explain how modern AI models can create stunning visuals (images and videos) from simple text prompts, enabling rapid content creation for product photos, social media posts, and ads. Emphasize the growing trend of AI-generated content in marketing and how it can give Dot & Key a creative edge. For example, AI image generators can produce high-quality product photos or lifestyle mockups in seconds, and AI video tools can animate a still product image into a dynamic Instagram Reel. Also mention that AI can even help generate virtual brand influencers or spokespersons, complete with photorealistic visuals and voices. This sets the stage for why the training is important.
Key Points to Cover in Introduction:
- What generative AI means (models that create new images, videos, text, etc. from prompts).
- How generative AI applies to skincare marketing – e.g. creating product photos, banner images, short promo videos, influencer-style content, etc., all tailored to beauty aesthetics.
- Quick overview of the AI tools/models we will use: Nano Banana Pro (for high-quality images), Higgsfield platform (multiple creative AI tools), and Kling AI (for video generation and editing). Introduce these tools at a high level: Nano Banana Pro is a state-of-the-art image generator built on Google’s Gemini model (known for ultra-realistic 4K images and even legible text on product labels), while Higgsfield provides an all-in-one suite for image and video generation (including “Kling” for advanced video motions).
- Show a couple of before/after examples to hook interest – for instance: a plain product image versus an AI-generated enhanced version with a creative background, or a static product shot versus an AI-generated animated clip (you can describe these if live demo isn’t possible). Describe how AI can transform a simple idea into polished marketing content quickly.
Keep this section non-technical and inspiring, to ensure even beginners grasp the potential. By the end of the intro, attendees should be excited about what they’ll be able to do (“In this training, you’ll learn how to turn Dot & Key product benefits into visual stories and build complete beauty campaigns with AI.”).
Overview of Tools and Models (Nano Banana Pro, Higgsfield, KlingAI)
This section provides a deeper overview of the specific AI tools/models we’ll be using, setting context for the hands-on sessions:
- Nano Banana Pro (Image Generator) – Explain that this is Google DeepMind’s advanced image generation model built on Gemini 3. It’s particularly powerful for marketers because it produces ultra-realistic, high-resolution images (up to 4K) and can handle text elements (like product labels or titles) with crystal clarity. Emphasize features relevant to the brand: it maintains consistency across images (great for keeping branding or a character consistent in a series) and can integrate real-world knowledge for on-brand details. For example, Nano Banana Pro lets you add readable text on a product label or create multiple images with the same model or product appearing consistently. This is ideal for Dot & Key to generate product photos, try out new packaging colors or backgrounds virtually, and create lifestyle scenes featuring their products.
Tools & Access: Mention that Nano Banana Pro can be accessed via platforms like the Artlist AI Toolkit or Google’s AI Studio, and it’s integrated into Higgsfield as the “Unlimited Nano Banana Pro” model. No coding needed – it has a user-friendly interface where you enter prompts and get images. - Higgsfield AI Platform – Introduce Higgsfield as an all-in-one generative AI platform for creators and marketers. It hosts multiple models and features for both images and videos. Key parts of Higgsfield relevant to us:
- Image tools: e.g., Seedream (an ultra-realistic photo model on Higgsfield), inpainting for touching up images, multi-reference blending to use reference images, and of course Nano Banana Pro is available within Higgsfield too.
- Video tools: Kling is the name for Higgsfield’s video generation/editing suite. They have versions like Kling 2.5 Turbo and Kling 2.6 which allow creating cinematic videos with AI. Higgsfield also offers specialized video tools like Sora 2 Trends (to turn images into short, trendy videos for social platforms) and WAN Camera (for more cinematic camera movements from a single image). Additionally, features like Motion Control let you apply motions from one video to an AI character, and AI Influencer tools to generate virtual people.
- Why use Higgsfield: It’s professional-grade, designed for marketers and creators to quickly produce content. It has presets for platforms (TikTok, Instagram Reels, etc.) and can export in those formats. We will leverage Higgsfield in the training for both image generation and especially for the image-to-video workflows.
- Kling AI (Video Generation) – While part of Higgsfield, highlight KlingAI separately as a cutting-edge text-to-video and image-to-video model. It allows you to take an image (say a product shot or an AI-generated model) and animate it into a short video by simply describing the desired action or scene. For example, you can upload a still image of a serum bottle or a person and prompt “the camera slowly circles around the skincare bottle as water splashes in slow motion” or “a woman calmly walks on a city street talking about skincare,” and Kling will generate a short video clip matching that description. We’ll use Kling to turn static product images or virtual influencer images into engaging video content. It’s known for ease of use – just a few steps (upload image, write a prompt, choose settings) to get a result. We’ll also discuss how Kling compares to other tools like RunwayML’s Gen-2, but our focus will be on Kling since it offers more control and is tailored for marketing content.
- Other Notable Tools – Briefly mention any additional tools we might touch: e.g., ChatGPT or Claude (for generating ideas, scripts or copy), voice AI like ElevenLabs (to create voiceovers for videos), and lip-sync tools like SyncLabs (to sync generated speech with a video of a person speaking). While the core of our training is visual content, acknowledging these will show how AI can cover the full spectrum (text, image, video, audio) in content creation. We won’t dive deep into these, but they come into play in advanced projects (like making a talking virtual influencer).
This overview ensures everyone knows the “palette” of tools at their disposal before jumping in. It answers the what and why of each tool, preparing learners for hands-on use.
Session 1: Fundamentals of AI Image Generation (Beginners)
Goal: Bring absolute beginners up to speed on creating images with AI. In this first session, cover the basics of text-to-image generation and prompt crafting, using skincare product examples throughout.
- How Generative Image Models Work (simple terms): Explain without heavy jargon – e.g., “AI image generators like Nano Banana Pro or Stable Diffusion interpret your text prompt and imagine an image that matches it, using patterns learned from millions of images.” You can use an analogy (like a digital artist that has studied tons of photos). Mention concepts like diffusion or GANs only briefly if at all; focus more on practical understanding that the AI needs a clear description to produce a good result.
- Prompt Engineering Basics: Introduce the idea that what you write in the prompt heavily influences the output. Provide a simple formula or tips for prompts: e.g., Describe the subject + context + style/details. For instance, “a close-up studio photograph of a face serum bottle on a dewy rose-petal background, soft lighting, high detail”. Show how adding detail yields a more specific image. You might reference a framework like the C.R.A.F.T. prompt method (as mentioned in foundational sessions) to Curate ideas, Refine wording, consider the Audience, get Feedback from the AI, and Track what works. Beginners should learn not to be afraid to experiment with different phrases.
- Live Demo / Example: Do a live generation or a walkthrough. For example: start with a very basic prompt like “skincare product photo” and show that the result is generic. Then iteratively refine: “skincare product photo of a blue Dot & Key moisturizer jar on a white background” – then add “studio lighting, highly detailed, 4K” – then add “splashes of water around it” etc. As you refine, the image gets closer to a high-quality ad shot. This teaches how to iterate prompts to get the desired output. If live demo is risky, use prepared example images at each stage to illustrate the improvement. (Ensure to note Nano Banana Pro’s strength in high resolution and text: if you include the brand name in the prompt, Nano Banana might actually render a legible Dot & Key logo on the bottle, which typical models can’t – this shows its advantage).
- Prompt Style for Skincare Aesthetics: Discuss what kind of descriptors are useful for beauty products. E.g., terms like “soft diffused lighting”, “glowing skin”, “elegant”, “minimalistic background”, “pastel color palette” tend to align with skincare branding. Provide a cheat-sheet of useful adjectives for product photography vs. lifestyle imagery. Also mention negative prompts (if the tool supports them) – e.g. “no text” (to avoid random text), “no distortions”, etc., to eliminate common AI flaws.
- Hands-on Practice: Let the trainees try writing a prompt and generating an image (if everyone has access to the tool). Start with a simple exercise: “Generate an Instagram-worthy photo of a lotion or serum”. Give them time to play and then share results. Encourage sharing what words worked or if they got weird results – this opens discussion on how to improve prompts (like clarifying ambiguity, adding more detail, or removing unwanted elements).
By the end of Session 1, they should be comfortable with the interface and able to produce a basic AI-generated product image. Keep it fun and low-pressure so beginners gain confidence.
Session 2: Crafting Photorealistic Product Images (Intermediate Prompting)
Building on the basics, Session 2 delves into advanced prompt engineering and image generation techniques specifically for product photography in the skincare/beauty context. This is where they go from “okay images” to truly polished, brand-worthy visuals.
Topics to cover:
- Photography Concepts in Prompts: Teach how to speak the language of photographers when prompting. For example:
- Camera Angles: “front-facing”, “close-up macro shot”, “45-degree angle”, “flat lay top view” – show how different angle keywords change the image. A top-view might be great for a product spread, whereas a macro close-up highlights texture (like a smear of cream).
- Lighting: “soft studio lighting”, “backlit glow”, “dramatic spotlight”, “morning sunlight” etc. Demonstrate how lighting adjectives set the mood – e.g., soft diffuse light for a clean, gentle skincare vibe vs. high-contrast dramatic light for a bold ad.
- Depth of Field: Terms like “bokeh background” or “shallow depth of field” to blur backgrounds and make the product pop.
- Environment and Props: In prompts, specify the setting or props: “surrounded by fresh flowers”, “on wet marble with water droplets”, “in a science lab with beakers” – aligning with product themes (organic, luxurious, scientific). Encourage creative thinking: e.g., Dot & Key’s vitamin C serum could be shown with orange slices and leaves, etc., which you can prompt explicitly.
- Ensuring Brand Consistency: Discuss how to achieve a consistent look and feel across multiple images:
- Using reference images: Most tools (including the Artlist/Higgsfield toolkit) allow uploading one or more images as reference along with the prompt. You can feed an actual Dot & Key product photo as a reference so the AI knows the exact shape/label, then have it generate new backgrounds or scenarios for that product. This way, the output stays on-brand (the product looks correct) while the AI imagines a new setting. Demonstrate this feature: upload a product cut-out image on white, prompt “place this product on a bed of tropical flowers” – the result should integrate the real product in a new scene.
- Using consistent keywords or styles in prompts: Decide on a signature style (e.g., always use “pastel background and soft glow”) to tie images together. If you generated a virtual model (in later session), you’d reuse their description or use the same reference image to keep them identical across shots. Nano Banana Pro’s strength is keeping characters/objects consistent in multi-image projects – highlight how that can be leveraged for a cohesive campaign look.
- Mention fine-tuning models (briefly): For example, if Dot & Key wanted absolute accuracy of product images, they could fine-tune an AI model on their product shots. However, that’s advanced and not necessary with the new tools – using references or even just the prompt with the brand/product name might suffice given Nano Banana Pro’s world knowledge. (It can recognize some brand/product concepts or fetch real-world info as it claims, but likely we rely on references for precision).
- Editing and Refinement (Inpainting/Outpainting): Introduce the ability to edit AI images for perfect results. For instance:
- If an image is almost great but has a flaw (maybe the cap on the jar looks odd), use inpainting: erase that part and prompt the AI to regenerate it correctly (e.g., “a proper silver bottle cap”).
- Use outpainting or extensions if needed to adjust framing (though Nano Banana Pro can generate in whatever aspect ratio, e.g., vertical for posters or horizontal for banners, up to 4K).
- Demonstrate quick edits: e.g., generate an image of a model holding a product, then inpaint to change the background or remove a stray artifact. This teaches them they’re not stuck with the first output – AI tools allow fine control in post-processing. Higgsfield’s Edit Image and localized editing features let you “paint” over an area and describe a fix. This can save time compared to doing it manually in Photoshop.
- Examples & Exercises: Now that prompts are more complex, show some amazing examples of AI-generated skincare product photos:
- For example, an image of a Dot & Key moisturizer jar on a dreamy water surface with flowers (if you have one from your trials or sources, share it). Describe the prompt that likely produced it and break down the elements.
- Another example: a flat lay image containing a variety of skincare products and ingredients – explain how you’d prompt such a composition (mention using plural and arrangement words, e.g., “arrangement of skincare bottles and fresh berries on a table, top view”).
- If possible, provide before/after of a real product vs AI-generated backdrop or a side-by-side of two styles (like one generated in “clinical lab setting” vs “spa setting”) to spark ideas of how flexible the tool is.
- Hands-On Challenge: Have participants do a mini-project: “Using AI, create two product photos for a Dot & Key product – one on a plain background for the website, and one lifestyle image for Instagram.” They should apply what they learned: first prompt a clean e-commerce style image (white or solid background, centered product), then prompt a more creative lifestyle shot (context, props, model if they want). Encourage them to use at least one reference (perhaps the actual product image provided to them) for authenticity. After generation, they can do one edit pass if needed. Then do a quick show-and-tell: review how each image aligns with the brand and discuss any prompt tricks used. This will reinforce intermediate prompting skills and give them portfolio-worthy outputs already.
By the end of Session 2, the team should be capable of producing photorealistic, on-brand product images and know how to tweak prompts or use references to get exactly what they need. They’re moving from beginner to intermediate level.
Session 3: Advanced Techniques – Multi-Modal and Creative Workflows
In this advanced session, cover multi-step workflows and mixing modalities (combining image and video generation, or mixing multiple images) to unlock more creative possibilities. This is where the content creation process starts to mirror a real campaign workflow, including storyboarding and concept development.
- Moodboards and Storyboarding with AI: Teach how AI can help in the pre-visualization stage of a campaign. Instead of manually searching for reference images, they can prompt AI to generate a moodboard or concept art. For example, if planning a summer-themed campaign for a sunscreen, they could prompt Nano Banana Pro to create a collage or grid of images with certain vibes (or just generate multiple images with the same prompt parameters to collect ideas). Tools like Nano Banana can even blend multiple reference images, which could be used to create a moodboard style output (though even generating images and assembling them manually works).
- Discuss using AI to storyboard a video: outline the sequence of shots on paper, then generate a sample image for each key scene using text prompts. This helps envision the final video before producing it. For example, storyboard for a 15-sec ad: Scene1: product on table with flowers (generate that image), Scene2: model applies the product (generate model applying cream), Scene3: logo and tagline frame. These AI-generated storyboard frames can be done in minutes and give a clear direction. This not only speeds up planning but also ensures the team and stakeholders can see the vision early.
- Multi-Image Consistency & Character Creation: Dive deeper into ensuring consistency when needed:
- If creating a series of images (or a video) with the same human model – introduce the idea of a virtual model/influencer that the brand can use repeatedly. Show how to do this either through prompt tricks or tool features. For instance, using Higgsfield’s “AI Influencer” tools or face swap techniques: you can generate one perfect face/person that embodies the brand, then impose that face onto various poses or scenes. The Medium tutorial example “Jen” did this by generating multiple images and then face-swapping to keep one face consistent.
- Alternatively, mention that Nano Banana Pro and similar tools have some ability to maintain a character if given as a reference – e.g., generate one portrait of an AI model you like, then use it as a reference for subsequent images (so the face carries over). It may not be 100% without fine-tuning, but it’s worth trying in the hands-on.
- For product consistency: discuss creating a custom model of the product. If Dot & Key had dozens of SKUs, training a model might be worthwhile; otherwise using reference images each time is fine. Just ensure they know it’s possible to get even more advanced with fine-tuning (maybe point to resources but not do it live due to time).
- Incorporating Generative VFX: Highlight some fun, creative effects AI can do, as hinted in the training proposal. Generative video effects (VFX) allow adding elements that would be hard or expensive to film. For example:
- Using Higgsfield’s visual effect presets: show one or two relevant ones for beauty context. Perhaps “Splash Transition” (water splash) or “Sakura Petals” falling could suit a gentle beauty ad, whereas something like “Explosion” is less relevant. If the tool allows, demonstrate adding a flourish to an image or between video cuts, like a burst of flower petals revealing the product.
- Trending transitions: For Instagram Reels, transitions are huge. Higgsfield has “Trending Transitions” features. Explain how one could generate a series of images (or use real ones) and then use an AI tool to morph or transition them creatively – e.g., transitioning from a model’s face to the product shot with a cool effect. If possible, show a popular reel transition recreated by AI (or at least describe it: “imagine the scene melting into the next, AI can handle that”).
- These advanced capabilities inspire the team to think outside the box – e.g., AI can make a product levitate, liquids flow in unreal ways, time-lapses, etc. – all without a physical shoot. Stress that these should be used in service of a creative idea, not just for gimmick’s sake. They should enhance the product story (like water swirling to imply hydration).
- Hands-on Advanced Exercise: Split into small groups (if applicable) for a project-based learning task: each group has to concept and create a mini-campaign asset using a mix of techniques:
- For example, one group does an animated product reveal (starting from a still image and adding motion + VFX), another group creates a carousel of images with a consistent theme (e.g., different products or ingredients, all in one style, to post as a carousel), and another might attempt a short stop-motion style sequence via AI (generating a few frames that show a sequence, like a cream jar opening and product coming out – this could be simulated by generating key frames). They can use multi-step workflows: generate base images, use image-to-video on one of them, maybe composite two outputs together if needed.
- Encourage creativity and applying what was learned: use references for consistency, use prompts for camera and lighting, perhaps use an AI video enhancer/upscaler at the end to polish quality. Also have them plan it out (storyboard or outline) before diving into generation – this reinforces structured thinking. You, as the trainer, circulate to assist with technical steps and prompt tips.
After this session, participants will have hands-on experience with more complex AI workflows, understanding how to combine multiple AI outputs and tools to achieve a final creative vision. They should feel empowered to tackle not just one-off images but integrated content pieces.
Session 4: AI-Powered Video Creation – From Images to Instagram Reels
Now we focus entirely on video content, since short-form videos (Reels, TikToks, influencer clips) are crucial for beauty brands. This session teaches how to go from a static concept to a full-motion video using generative AI.
- Image-to-Video Basics with Sora 2 Trends: Reintroduce the concept from earlier: starting with a high-quality image (which could be AI-generated or a real photo) and animating it. Sora 2 Trends on Higgsfield is a great entry point because it’s template-based and user-friendly. Explain that Sora 2 is designed to create “scroll-ready” short videos from an image, ideal for social media.
- Demo: Take a product image (say a jar of cream) and feed it into Sora 2. Choose a preset like the “Luxury Ad” preset, which is tailored for a polished product reveal. Add a simple prompt guiding the style of motion, e.g. “elegant slow reveal with soft lighting” (the AI uses this to decide how to move the camera or animate light). Generate the clip. You should get, for example, a 5-8 second video where the camera slowly dollies in, the product might catch a light flare, and the brand name comes into focus – essentially looking like a high-end ad shot. Cite the mascara example from the blog: they achieved a soft dolly-in, lighting flare, and a final focus on the logo from one still image. Emphasize speed – this took them under 5 minutes to create, which is game-changing for content teams.
- Show how the tool automatically handles technical aspects: it keeps reflections and lighting continuity so the motion looks natural, and it can output in vertical format for Reels by default. The user basically just tweaks a few settings. This lowers the barrier for the team to start making videos.
- Advanced Video with WAN and Kling: For more control or longer clips, introduce WAN Camera Control (WAN 2.5) and Kling:
- WAN 2.5 (Camera Control): This tool lets you direct the camera more deliberately in a scene. For instance, you could specify a camera pan or a zoom combined with a tilt, etc. It’s useful when you want a cinematic shot from an image or a narrative feel (like moving through a scene). In a skincare context, WAN might be used to create a short “film-like” shot – e.g., starting from a wide frame of a vanity table then zooming into the product. The blog noted WAN preserves the image’s details well even with motion and is great for storytelling sequences. So, if a campaign needed a slightly longer ad with multiple camera moves, WAN is the go-to.
- Kling (Text-to-Video): Now go deeper into KlingAI’s image-to-video function that we introduced. This is more free-form than Sora; you can literally describe an action or movement and it tries to enact it. For example, have a still image of a model (or virtual influencer) and use Kling to make a 10-second video of them walking through a spa or winking and pointing at a product, etc. Walk through the steps from the Medium guide: 1) upload the image of the person, 2) input a prompt like “a woman influencer slowly and calmly walks forward in a spa setting, smiling” (basically script the action), 3) choose settings (professional mode, length ~10s), 4) hit generate. The output will be a rough video of that person performing the described action. It might not be perfect Hollywood quality, but good enough for quick social clips. If possible, show an example result or at least describe one to set expectations (maybe reference how the Medium author’s result looked good without much tweaking).
- Limitations and Tips: Explain that while these video models are powerful, they might occasionally produce artifacts (e.g., weird hand movements or minor glitches). It’s often about trial and error with prompts or using shorter segments. Also, highlight that post-processing is possible: after generating, one can use AI upscalers or frame interpolation to smooth things out. Higgsfield itself has a video enhancer to stabilize and polish the clip – mention using that as a finishing step (and demonstrate if time permits).
- Adding Audio and Voiceovers: A video isn’t complete without sound. While not the core of our visual training, give a quick pointer on AI audio:
- For background music: mention you can use AI to generate music or sound effects fitting the vibe (many tools or stock AI music exist). Dot & Key might, for example, want a gentle, soothing music for a skincare reel. AI can compose that, or provide royalty-free tracks quickly.
- For voiceovers or spoken content: if creating an influencer-style talking video, explain how to generate speech. Using a service like ElevenLabs or similar, you input a script (which you could even write with ChatGPT) and choose a voice to get a realistic voiceover. This can produce a voice track of, say, an enthusiastic beauty influencer talking about the product benefits.
- Lip-Syncing (for talking videos): If the video has a person speaking (their mouth moving), you need to sync the AI voice to it. This is where tools like SyncLabs or the Lipsync Studio in Higgsfield come in – you upload the generated video and the audio file, and the AI adjusts the mouth movements to match the speech. It’s quite automated. This is advanced, but it enables fully AI-generated talking head videos. You could mention the example from the Medium tutorial: they made a virtual influencer who can talk, walk, and even dance via these combined techniques – something that would normally require a full production team is now doable with AI tools.
- Practical Example – AI Instagram Reel: Together with the class, create a simple 10-second Instagram Reel from scratch:
- Concept: Say we choose a new Dot & Key face serum as the hero. Concept could be “a dreamy reveal of the serum bottle with nature elements”.
- Image Generation: Use Nano Banana Pro to create a high-res image of the serum in a nature setting (or use an existing product image as base). Ensure it’s vertical format for IG reel cover.
- Animate: Feed that image into Sora 2 Trends with prompt “slow camera push through tropical leaves revealing the serum, glimmering light” and use a preset (maybe “Dramatic Reveal”). Get a ~5s clip. Then perhaps use WAN or Kling to extend or add another shot: e.g., generate a second scene of the product from another angle or the product text appearing. Tools like Higgsfield allow stitching or transitions, or we can just plan it as two separate clips.
- Combine: If multiple clips, show how to combine them (in Higgsfield’s editor or external simple video editor). Add a text overlay or the Dot & Key logo at the end (which can be done by prompting Nano Banana to produce a clean frame with the logo – since it can do text well, or just overlay manually).
- Music: Pick or generate a short music clip that matches (or use an existing royalty-free tune if easier).
The result: a polished Reel ready to post. Play it for the group. This hands-on walkthrough solidifies the process and shows that in perhaps 15-30 minutes of AI work, you can create a social video that looks professionally made.
By the end of Session 4, the team should feel capable of turning their AI images into videos, understanding different tool options for animation, and knowing the additional steps (audio, syncing) for a complete video. They’ll have at least one example Reel or short video under their belt.
Session 5: Creating Virtual Influencers and AI-Generated Talent
This session is all about the “human element” – using AI to generate people (models, influencers, spokespersons) who can represent the brand in images and videos. It’s an exciting and novel area, and perfect for Dot & Key’s marketing team to explore influencer-style content without always needing real photoshoots.
- Concept of Virtual Influencers: Start by explaining what a virtual influencer is – essentially a fictional persona created by AI that looks and behaves like a real person, whom brands can use for marketing. Show famous examples (like Lil Miquela globally, or any AI model that has an Instagram). Emphasize how this can give Dot & Key a consistent “brand ambassador” that they have full creative control over – from her looks to her personality and script – and no scheduling hassles or talent fees. It’s also a safe playground for creativity (for example, a sci-fi themed influencer for a futurist campaign, etc.).
- Designing the Persona: Before diving into generation, outline the steps to create an AI influencer (referencing the 7-step pipeline from the Medium article as a guideline):
- Character Concept: Decide on the influencer’s characteristics – e.g., a friendly 25-year-old female dermatology expert, or a glamorous fashionista, etc. Define their look (hair, skin tone, style) and vibe. This acts like a creative brief.
- Initial Image Generation: Use an image model (Nano Banana Pro or another like FLUX or Midjourney) to generate the person’s portraits. Prompt with the desired attributes: e.g., “portrait photo of a South Asian beauty influencer, radiant clear skin, warm smile, wearing modern chic makeup” – to get a starting image. You might generate a few variants until you find a face that everyone likes and that fits the brand image. Tip: providing a reference of a real person or a style can help the AI get closer.
- Consistency Across Images: As noted earlier, the challenge is to keep the same face in all content. Introduce two methods:
- Face swapping: Take the best face (from your chosen image) and use a tool to swap that face into other images or videos. The Medium tutorial used Remaker for face swapping to put “Jen’s” face on different bodies/backgrounds. We can do similarly – generate several poses or scenes and then composite the chosen face.
- Fine-tuning a model: This is more advanced – training a custom model on that face so it can generate the person in any pose. Services like PhotoAI can do this if you upload 20-30 images. We likely won’t do this in training due to time, but explain it’s an option if they want to invest in a truly bespoke AI ambassador. For now, face swap or careful prompting with reference images will do.
- Generating Poses & Scenarios: Once the face/character is set, generate images of that influencer doing various things: holding a Dot & Key product, applying serum on her face, giving a thumbs-up, etc. Prompt with the scenario and include either the face as a reference or consistent descriptors (“the same woman from before…”). Nano Banana Pro’s consistency feature might help here if used properly. Also, consider using Multi-shot or pose controls if available (some AI tools let you specify a pose via stick figures or keywords). The goal is to get a library of on-brand influencer images.
- Video of the Influencer: Now, pick one of those images (e.g., the influencer holding a product and smiling) and create a short video. Using Kling AI’s image-to-video, animate the influencer: for instance, make her wave or walk or simply talk. Provide a prompt like “the woman raises the serum bottle and cheerfully says a line” (we will handle the actual talking via audio in the next steps). Generate the video clip of her motion. It might take a couple tries to get a natural-looking motion – presets or shorter moves (like just head and hand movement) can be safer than full-body walking at first.
- Script and Voice: Write a short script for what the influencer will say (maybe one sentence praising the product). You can do this manually or ask ChatGPT to draft something peppy. Then use a text-to-speech tool (like ElevenLabs “Laura” voice, which the tutorial used) to generate the voice audio. Ensure the tone fits (enthusiastic, friendly).
- Lip Sync: Take the AI video (which likely has the person’s mouth moving arbitrarily or not at all in a meaningful way) and the audio, and use a lip-sync tool to align them. This will result in the influencer’s mouth matching the speech, making it look like she’s genuinely talking.
- Polish & Publish: Finally, combine the video and audio (if the lip-sync tool hasn’t already), add subtitles or graphics if desired (AI can help generate those too, or just do manually). The virtual influencer video is ready to share!
- Ethics and Brand Alignment: It’s important to briefly address the ethical and brand considerations:
- Ensure the team knows to disclose AI-generated influencers if used publicly (transparency is a growing expectation). Also, be sensitive in design – the influencer should represent brand values and not accidentally mimic a real person too closely (avoid any individual’s exact likeness unless authorized).
- The content still needs to be reviewed like any marketing asset (for accuracy of claims, etc.) – AI can make things up, so scripts and visuals should be checked (e.g., ensure the product is shown accurately and no misrepresentation occurs).
- Hands-On (if time permits): Creating a full talking influencer video might be too lengthy to do from scratch in-session, but you can do parts of it:
- Have each participant or pair create a virtual persona image they think would make a good Dot & Key influencer. They can present the persona (name, style) and the AI-generated picture. This is a creative exercise and can be fun.
- Optionally, pick one persona as a group and walk through the process to animate it: maybe generate one short clip of that AI model waving or blowing a kiss. Even without voice, that’s a big moment – they see an AI-created person moving like in a real video.
- If pre-prepared, you could show a demo of a talking AI influencer you made before – illustrating the final result of all steps (e.g., “Hi, I’m __ and I love Dot & Key’s products because …”). Seeing is believing, and it will likely impress the team to see a lifelike spokesperson that never existed until now.
By the end of Session 5, the trainees should understand how to create and use AI-generated people in their marketing – from static influencers in product photos to dynamic virtual influencers in videos. This opens up a whole new avenue for campaigns (like virtual try-on demos, expert advice reels, etc.), which they now have the knowledge to explore. It also reinforces a lot of skills (prompting, image-to-video, audio) in a unified project.
Session 6: Project-Based Learning – Build a Mini AI-Driven Campaign (Capstone)
In the final session(s), consolidate everything learned by having participants actually produce a mini-campaign for a Dot & Key product using generative AI end-to-end. This is essentially a capstone project where they apply all skills: ideation, prompting for images, creating a video, writing copy, etc. It can be spread over multiple hours with presentation at the end.
- Choose a Campaign Brief: Possibly split the class into teams, and assign each a product or theme (or let them choose one). For example: Team A does “Dot & Key Night Serum – Midnight Magic” campaign, Team B does “Vitamin C Serum – Summer Glow” campaign, etc. Each team will create a set of deliverables: say 2 AI images (one product hero shot, one lifestyle or ingredient flat-lay shot), 1 short video (15s ad or Instagram reel), and accompanying copy (a catchy caption or tagline), all consistent with their theme. This mimics a real campaign package.
- Process Guidance: Outline the process they should follow (essentially applying the steps from previous sessions):
- Brainstorm & Moodboard: Have the team discuss the product’s key benefits or mood. Use ChatGPT or just group discussion to come up with a campaign idea (“What story do we tell? What feeling do we want to evoke?”). Then use AI to generate a few moodboard images to visualize the idea. For instance, if the theme is “Midnight Magic” for a night serum, maybe generate images of night skies, moons, a woman sleeping with glowing skin, etc., to get the creative juices flowing. This aligns with “turn product benefits into visual stories” as initially planned.
- Storyboard the Video: If they’re making a video, plan out 3-5 scenes. They can draw it or just list them. Decide which AI technique fits each scene (image-to-video for a product shot, text-to-video for an animated background, etc.).
- Divide and Conquer Generation: Team members can split tasks – one works on the product image, one on generating the influencer or model shot, one on the video animation – then bring it together. Remind them to apply the prompt engineering techniques learned: use references if needed (maybe they use the actual product photo in one of the generations for authenticity), maintain style consistency (agree on a color palette or lighting style to use in prompts across all assets).
- Production: Over the next chunk of time, they create the assets. You act as consultant, checking in if they hit snags (e.g., if an image isn’t coming out right, help refine the prompt; if the video is jittery, suggest using a different preset or shorter motion, etc.). They should also use editing tools as needed – e.g., if the label on the product didn’t come out well, quickly inpaint it, or if the timing in video is off, trim or use a different tool. Essentially they’re experiencing a mini AI content studio workflow.
- Copywriting with AI: Once visuals are ready, have them also get a taste of using AI for text. Ask them to craft a catchy caption or product description to go with the visuals. They can use ChatGPT with a prompt like “Write an Instagram caption for a post about <product>, emphasizing <benefit>, in a fun tone with emojis” or similar. This ties back to the earlier note that AI can assist with copy and SEO content as well, ensuring they remember AI is a multi-purpose tool.
- Presentation and Feedback: Each team presents their mini-campaign: show the images and video, maybe as if pitching it to the Dot & Key managers. They explain the idea and how they achieved each asset with AI. Celebrate the creativity – likely we’ll see a variety of approaches (one might have a virtual influencer demo, another a purely aesthetic montage, etc.). This also reinforces peer learning as they’ll see tricks others used. Provide feedback and additional tips: e.g., “Team A’s video came out a bit low-res – remember we can upscale that” or “Team B’s virtual model is great, you could reuse her in future campaigns as a signature face.” Tie feedback to techniques (“Perhaps next time use generative VFX like we learned – e.g., add a sparkle effect when the product appears, which AI can do easily.”).
- Wrap-Up: Conclude the training by summarizing the journey from basics to advanced:
- Reiterate key takeaways (prompt smartly, iterate often, combine tools for best results, always align with brand style).
- Encourage them to continue exploring new features (AI is evolving fast – today’s Nano Banana Pro might get even better, or new models will emerge). They should keep experimenting and maybe even form an internal AI creative team to champion these techniques.
- Also mention practical next steps: integrating these workflows into their content calendar, setting up accounts or subscriptions for these tools, and maintaining ethical guidelines (e.g., watermarking AI content if needed or disclosing when appropriate).
- End on an inspiring note: they are now equipped to “build beauty campaigns with AI”, from brainstorming ideas to producing final ads. With practice, what took a whole team weeks can be done in hours, allowing more time for creativity and strategy. The possibilities – from AI-generated product launches to personalized content for different audiences – are endless.
Finally, leave room for Q&A and discussion. The team might have questions about specific use cases (“Can we do this for print catalogs?” – Yes, 4K images are print-ready; “What about using AI for customer service?” – beyond our scope but mention chatbots briefly, etc.). Address these, reinforcing that generative AI is a tool to augment their creativity and productivity, not replace their vision.
Throughout this comprehensive 12-hour program, we covered everything from beginner-level prompt writing to advanced multi-modal content creation, all tailored to skincare and beauty marketing. By providing step-by-step processes, storyboarding practices, plenty of prompt examples, and hands-on projects, the Dot & Key team now has a deep, practical understanding of how to leverage generative AI – using Nano Banana Pro, Higgsfield, KlingAI and more – to produce amazing product photos, engaging Instagram reels, and even virtual influencer videos. They have essentially become AI-augmented creatives, ready to apply these skills to real marketing campaigns.
Learn directly from India’s best AI corporate trainer. Explore the digital marketing course led by Rishi Jain at Digital Scholar.